One of our favorite desserts are these little
Chocolate Chip Cannoli. The kids absolutely love them and they are really easy to make. We have tried a few different recipes over the years and this is the one we settled on. This recipe is the one my brother and sister in-law asked me to make for their wedding..what an honor...no pressure or anything! They turned out great and this simple dessert has become a regular for us!
You will find them at the bakery with pistachio bits on the end. The kids are not a fan of the texture of the nuts on the end so we leave those off. Our favorite way to fill them is with tiny chocolate chip bits. I like to use the small cannoli shells instead of the larger ones. The mini make a perfect little snack!
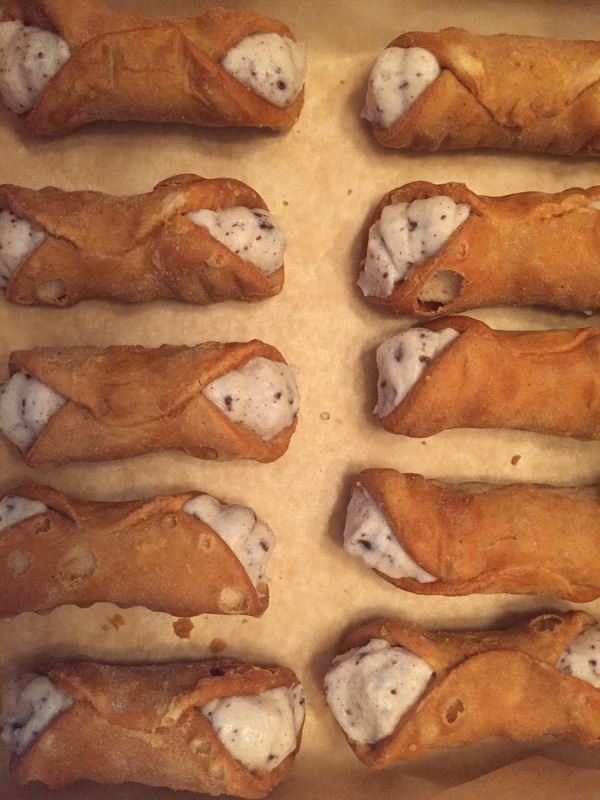
Chocolate Chip Cannoli
I am not certain of the origin of this recipe. In the attempts to find just the right one for the wedding
we had several we were working from and this is a combination of several. Feel free to substitute whatever you would like for the chocolate chips.
Hope you enjoy!
To make the Cannoli you will need:
1 1/2 cup of ricotta cheese (I use whole milk ricotta)
1 cup of powdered sugar
1/2 cup of whipping cream
1/2 teaspoon cinnamon
2 oz dark chocolate chopped up into tiny bits or grated with a microplane.
Grate or chop the chocolate and set aside. Mix the remaining ingredients together then add the chocolate. Do not over mix once you have added the chocolate, especially if you grated the chocolate. It will melt and change the appearance of the tiny bits mixed into the cheese mixture.
Once mixed I spoon the mixture into a disposable icing bag. Once full I snip off a small bit from the tip of the bag. Then stick the tip of the icing bag into the cannoli shell and fill. I usually fill from both ends instead of pushing the mixture through from one side.
Once the cannoli shells have been filled I will sprinkle a bit of powdered sugar or cocoa powder on the top and serve.
It is best to fill the cannoli right before you serve them so that the cannoli shells stay crisp. Otherwise the shell will soften with the moisture of the filling.
The filling will keep in the bag for up to four days.
 RSS Feed
